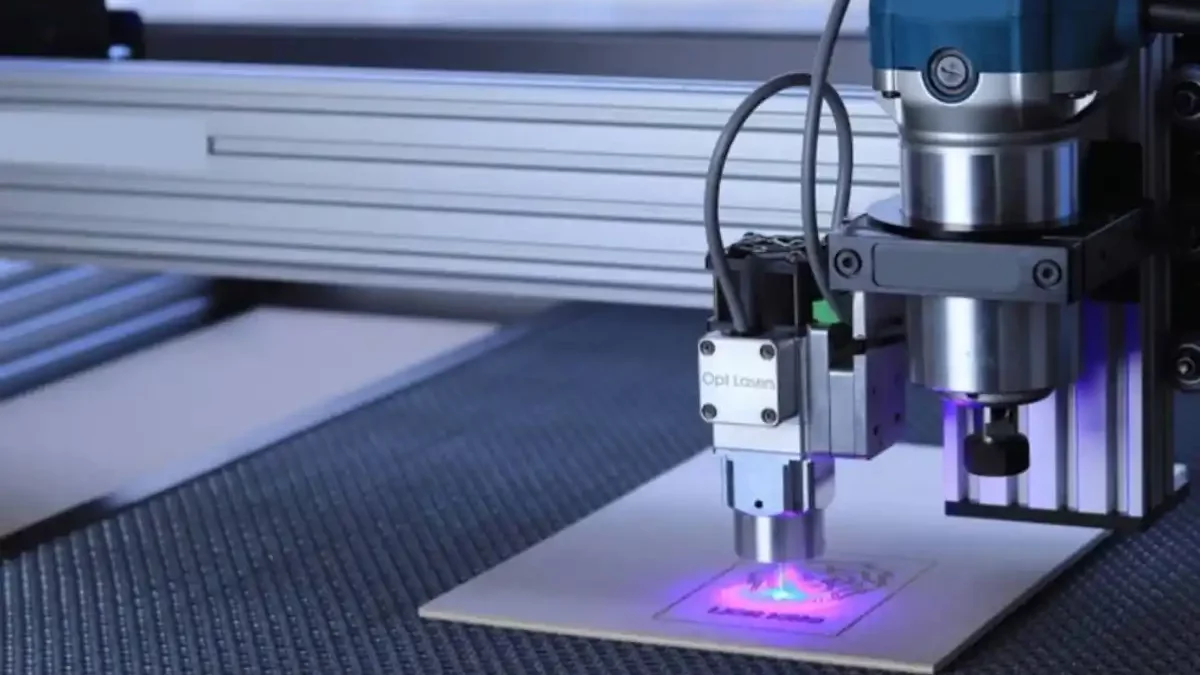
CNC cutting and laser cutting are two of the most popular processes for creating precise, high-quality products in a short amount of time. Both technologies work by guiding a tool or machine over a preprogrammed design, which can be programmed into the computer or drawn by hand. CNC machines have been around since the mid-20th century; lasers have been used in manufacturing since the 1960s. Today, both technologies are widely used across many industries from fashion to architecture
Table of Contents
Define your goals.
Now that you have a good idea of the project, it’s time to define your goals. What is the purpose of this project? also What do you want to achieve? and What are your expectations? Are there any limitations or budget constraints involved with this project?
The answers to these questions will help guide all facets of your CNC cutting & laser cutting project. From design and materials selection all the way through installation and maintenance. The more fully defined your goals are at every step of this process. The easier it will be for everyone involved to keep their eye on what’s most important—your satisfaction!
Create a workflow.
A workflow is a sequence of steps that you take when working on a project. It’s important to create a workflow because it helps you figure out what information you need, how to collect it and where to put it.
A workflow is not the same as a process map or Gantt chart, which are used for projecting time and budget requirements. A workflow can be created with any tool, but if your project involves multiple people or departments within your organization then you’ll probably want something more advanced like MS Project or Primavera P6.
Choose the right tools and materials.
Once you’ve decided to start your project, the first step is to identify the materials and tools that you need. The type of material you use depends on what kind of project it is and what properties it should have. For example, if you’re making a wooden box for jewelry storage and want it to be durable enough to hold heavy items without breaking, then using hardwood would be best. If you’re making a small toy car for your nephew’s birthday and don’t mind if he breaks it while playing with the toy car then softwood could work just fine too!
The materials can also be classified based on their hardness or softness: hard material (hardwood) vs soft material (softwood). When cutting these types of materials using CNC routers or laser cutters, this classification plays an important role in choosing which tool would result in optimal performance.
Determine how detailed your project needs to be.
The more detailed your project, the more time it will take to complete. How much detail you can get depends on the machine you are using and its capabilities. If you want to do fine detail work, you will need a smaller machine so that there is less material waste when cutting out small details.
If possible, try to test out your materials before deciding on an exact design for your project. This will help determine how long each phase of the process will take and give you an idea of what kind of costs are involved based on material types and their respective thicknesses.
Get creative with laser cutting software.
Laser cutting software is a tool that helps you to design and cut your projects. The software can be used to create designs and cut them out, or it can be used to create templates for your projects. You might also want to use the laser cutting software for designing control panels for various machines.
Many different types of software will allow you to do this; however, if you are just starting out as a CNC enthusiast or are trying something new, we recommend using Fusion 360 (formerly known as Autodesk 123D). It is a free tool from Autodesk that allows you not only basic functions but also advanced features such as CAM integration and 3D printing.
Map out your designs.
Before you start cutting, take the time to plan out your project. CNC is not a plug and play technology—you need to know exactly how your design will be interpreted by the machine. In the example below, two different designs were made on the same sheet of plywood. The first design was created without any planning. Note how jagged it looks and how many scrap pieces were required to make it work. In contrast, the well-planned piece allows for more cuts in less material (and fewer scraps).
Organise workshops.
Organising a workshop can be a daunting task, but it is an essential part of your project. If you’re just starting out with CNC cutting or laser cutting, organising a metal workshop building can be very helpful in terms of getting to know others who are also interested in creating their own projects.
If you need help finding the time and space to hold your workshops, go ahead and ask around! Some schools have space that they allow students to use during breaks (especially if they’re small schools), while other organisations might have meeting rooms that they allow members of their community to book at no charge. You could also try contacting nearby libraries or community centres—they might be willing to host your event for free as long as there’s some sort of benefit for them (e.g., attracting new members).
Organizing workshops is often easier said than done because there are so many things that could go wrong along the way. People may not show up. People may show up late. Nerves might get in the way (and then even more nerves) etc. However I think one thing we can all agree on is that it’s totally worth doing no matter what happens along the way. Having fun building stuff together will always make it worthwhile!
Create templates for your projects.
When creating a template, you can use a laser cutter to cut out the shape of your template. Depending on your needs and what type of project you’re working on. Consider using a CNC router or CNC milling machine for this step instead. According to an experienced seller of CNC routers in Sydney, you can also use a 3D printer for this step. As well as an inkjet printer if it’s appropriate for your project.
Create your templates digitally using software like Adobe Illustrator or Inkscape (both free). It’s easy to save those files in both vector and raster formats. They can be used by different types of machines such as laser cutters and vinyl cutters as well as CNC routers/mills or digital embroidery machines.
Customise your control panels.
For a CNC cutting project, make sure your electrical control panels are easy to use. It should be simple and intuitive. So that you can find the buttons and switches easily when using it in an emergency situation. Also, the screen should be easy to read and understand. This will depend on what kind of work you do. If you are making small parts with few details, a smaller screen will suffice. However if you are working with larger pieces or more detailed ones. Then the bigger screens would probably be better suited for this type of work. You might also want to consider having additional monitors for backup purposes. Just in case something happens with one monitor during operation. This could cause problems with accuracy as well as safety issues if not addressed quickly enough!
Conclusion
We hope that this post has helped you get started with your CNC cutting and laser cutting projects! The most important thing is to be patient, take your time and work through any problems as they come up. It’s also important to remember that there are many different ways of approaching these projects. So don’t feel like you need to do everything we suggest here.